Micronova Es99 User Manual »
Per informazioni sull'acquisto contattaci
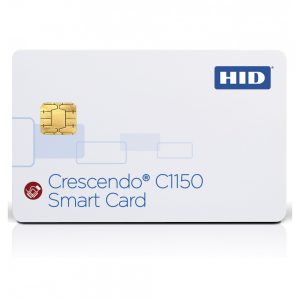
Gemalto Smart Card IDPrime MD 830 (with OTP ready for CAS server customers)
23,58€ IVA esclusa
Per informazioni sull'acquisto contattaci
Micronova Es99 User Manual »
The ES99 has hidden "Shift" functions accessible by holding INPUT SEL for 5 seconds.
You have likely never used a device like the ES99 because the AHT DEPTH knob does not work like a traditional distortion pedal. micronova es99 user manual
The ES99 features a clear front panel and a terminal block on the rear. Here’s the standard labeling: The ES99 has hidden "Shift" functions accessible by
| Front Panel Element | Function | |---------------------|-----------| | PV Display (green) | Process Value (current temperature, pressure, etc.) | | SV Display (red) | Set Value (your target) | | SET button | Enter menus / confirm settings | | ▲ / ▼ buttons | Adjust values / navigate parameters | | OUT1 / OUT2 LEDs | Indicate active outputs (heating, cooling, alarm) | ⚠️ Manual warning: Do not connect power to
Rear Terminal Block (typical):
⚠️ Manual warning: Do not connect power to sensor terminals — permanent damage will occur.
Before connecting power or audio cables, please adhere to these safety protocols.
| Peso | 100 kg |
|---|---|
| Specifiche Tecniche | Minidriver enabled contact smartcard, with Plug & Play capability CC EAL5+ / QSCD certified Fully supported by IDGo 800 (Minidriver, PKCS#11 libs, Credential Provider) Sleep mode activated 5:DESFire EV1 card body set with Key = 000.000 |
| Applicazioni | Accesso Logico Accesso Fisico Applicazioni di Sicurezza Applicazioni con gestioni di certificati digitali |
Prodotti correlati
-
Smart Card Tag e Token, Contact Card, Contactless Card, Smart Card & Tags, Smart Card Bianche, Contact Chip Blank, PKI Card, Gemalto Cards
Gemalto Smart Card IDPrime MD 830 B FIPS 140-2 Level 3 Precut
 Smart Card Tag e Token, Contact Card, Contactless Card, Smart Card & Tags, Smart Card Bianche, Contact Chip Blank, PKI Card, Gemalto Cards
Gemalto Smart Card IDPrime MD 830 B FIPS 140-2 Level 3 Precut
Gemalto Smart Card IDPrime MD 830 B FIPS 140-2 Level 3 w/o OTP SIM Pre-cut material ABS
SKU: O1100988